Celeste is one of my favorite games of all time. In Celeste, you climb Mt. Celeste with the help of a snappy air-dash ability. The bulk of the game consists of navigating from screen to screen, moving ever-upward in your quest to reach the summit of the mountain.
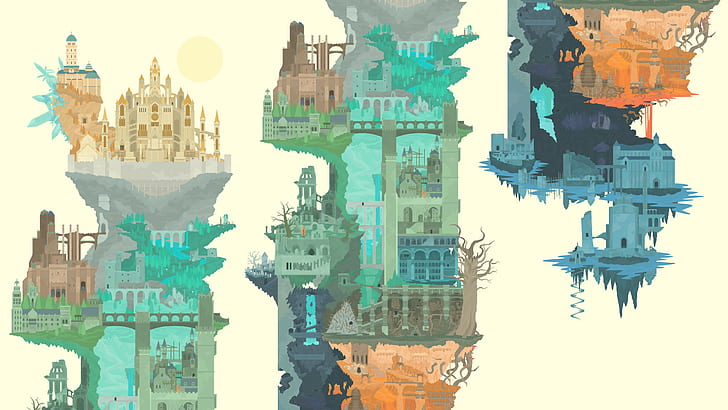
In Celeste, you never see the mountain in its entirety other than on the low-poly world map, which was slightly disappointing to me. I’m very fond of full-game visualizations, like this piece from Judson Cowan that depicts the entire world of Dark Souls:
I thought it could be an interesting exercise to stitch Celeste’s levels together to generate a complete visualization of the game world.
Design Considerations
First, I wanted to create a proof of concept, so I limited myself to the first area of the game (the “Forsaken City”). The precise location of each area relative to the others is not shown, so I was only able to create a single visualization for each area.
I also wanted to avoid lots of tedious pixel-by-pixel alignment. While I could theoretically take screenshots and carefully align them, this process would take hundreds of screenshots and would therefore not scale well.
After a brief investigation, I found some existing machine learning algorithms I could leverage for this task: the OpenCV project provides open-source tooling for computer vision. In machine learning terms, I wanted to identify key characteristics of each image, then automatically use those characteristics to determine how the images should be stitched together. To accomplish these goals, I decided to use OpenCV’s functionality in a Python project.
Taking Pictures
To begin, I gathered some screenshots of a few levels in Celeste’s first area. I created a new save file and configured Madeline, the playable character in Celeste, to be invisible so that the character would not show up in my screenshots of the environment. To ease the process of taking these screenshots, I also turned on a number of cheats, like infinite airdashes and invulnerability.
I quickly identified a problem: levels in Celeste are essentially shaped like rectangles, and these rectangles don’t overlap with each other. As a result, individual screens in Celeste don’t share any features between them. OpenCV’s model relies on being able to identify the same feature appearing in multiple screenshots, but if I were to simply take a screenshot of each level, each feature would only appear in a single screenshot.
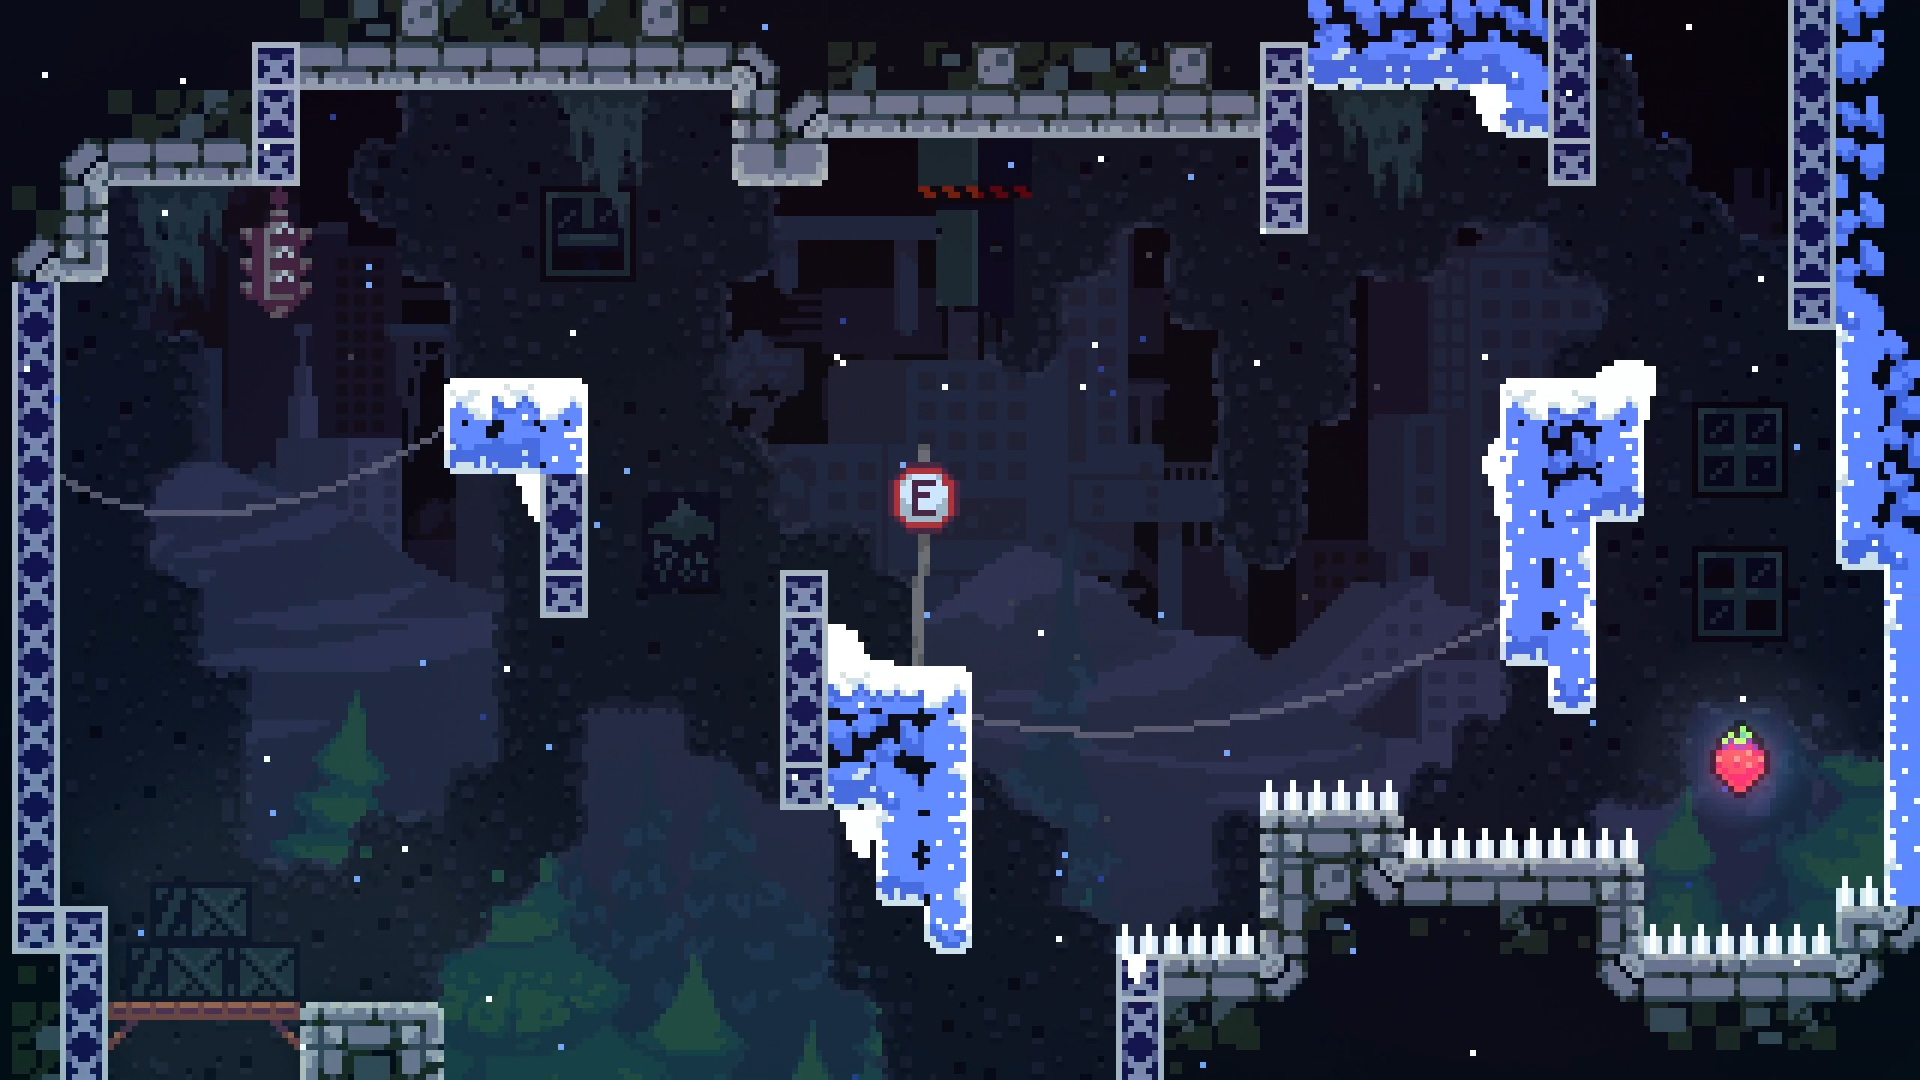
Fortunately, Celeste has smooth level transitions. During these transitions, features from adjacent levels become visible as the camera moves from one screen to another. With that in mind, I decided to include multiple screenshots that were taken during each level transition so that my screenshots would have overlapping features that could be matched by OpenCV. To make it easier to catch screenshots of these quick transitions, I recorded my gameplay with OBS, then extracted individual frames of the transitions from the recorded footage.
![]()
After including these extra screenshots, I was left with 22 screenshots of the first 5 levels in Celeste.
Python Code
Before I could use these screenshots in a Python scripts, I needed to load them from my hard drive. In order to load the screenshots into memory, I wrote a small function that iterates through each file in a given folder, and loads each file into an OpenCV image object. Finally, the function returns a list containing all the images that were loaded.
import os
import cv2 as cv


def load_images(dir_path):
    images = []
    for filename in os.listdir(dir_path):
        image_path = os.path.join(dir_path, filename)
        image = cv.imread(image_path)
        images.append(image)
    return images
I also needed to write a function that takes a list of images and stitches them together into a cohesive whole. OpenCV’s stitching pipeline is quite powerful, and is capable of stitching images that were taken from different perspectives into a single panorama image:
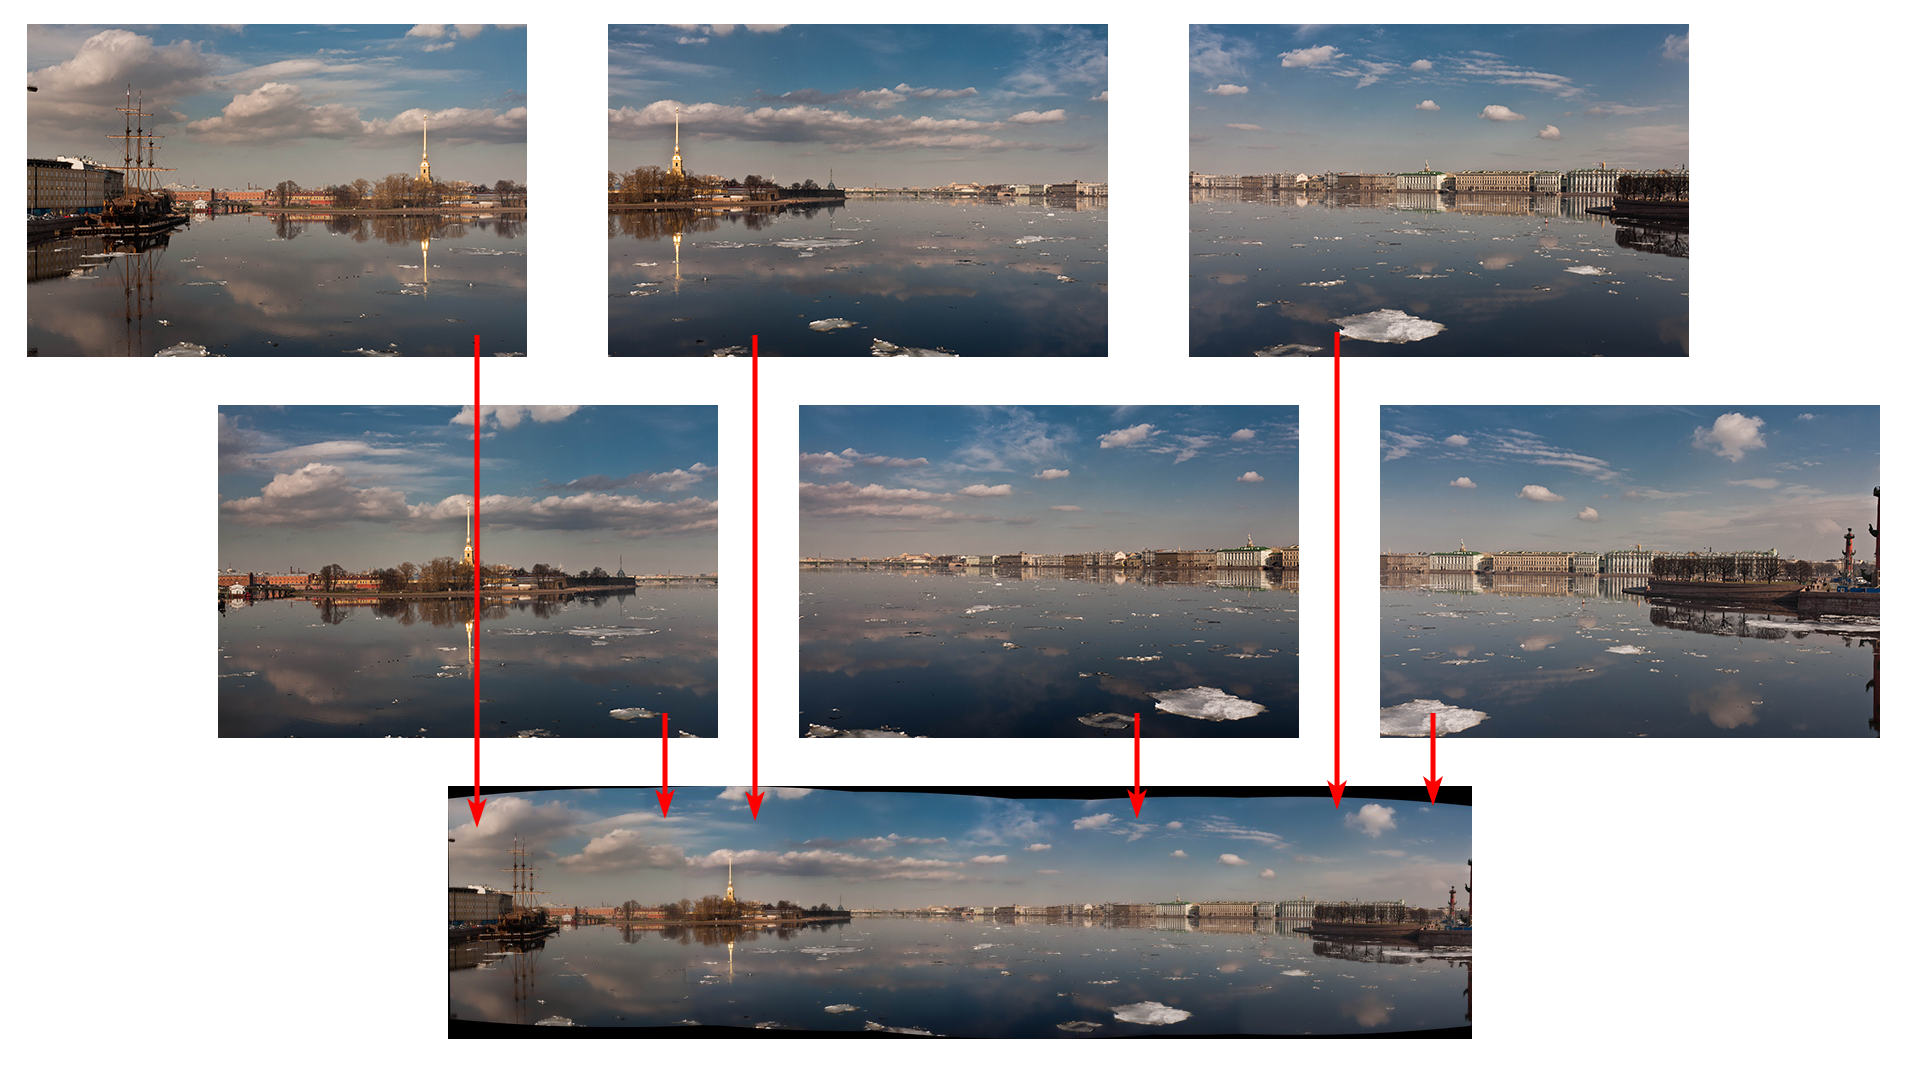
Celeste is a strictly 2-dimensional game, so I knew the perspectives of my screenshots would never change. I needed to use the cv.Stitcher_SCANS flag to inform OpenCV that the image stitcher would only ever need to consider affine transformations instead of warping or skewing the supplied images.
I also needed to consider which resolution should be used to process these screenshots. Since my monitor is a 1080p monitor, all of my screenshots were 1920 pixels wide and 1080 pixels tall (approximately 2 megapixels per screenshot). I aimed to reduce these dimensions to speed up the rate at which OpenCV is able to detect distinguishing features.
Since Celeste is composed entirely of stylized pixel art, the game only needs to run at an internal resolution of 320x180 pixels. This resolution was a good starting point, but to make sure the center of each pixel is sampled, I doubled each of these dimensions, so that OpenCV would process these images at a resolution of 640x360 pixels.
Armed with all this information, I could finally write a function to stitch together a list of OpenCV image objects:
# image processing resolution in megapixels
RESOLUTION_MEGAPIXELS = 640 * 360 / 1000000


def stitch_images(images):
    # restrict stitcher to affine transformations (2-dimensional "scans")
    stitcher = cv.Stitcher.create(cv.Stitcher_SCANS)

    # set image processing resolution
    stitcher.setRegistrationResol(RESOLUTION_MEGAPIXELS)
    stitcher.setSeamEstimationResol(RESOLUTION_MEGAPIXELS)
    stitcher.setCompositingResol(RESOLUTION_MEGAPIXELS)

    status, stitched = stitcher.stitch(images)
    if status != cv.Stitcher_OK:
        print(f"Can't stitch images, error code = {status}")
        return

    return stitched
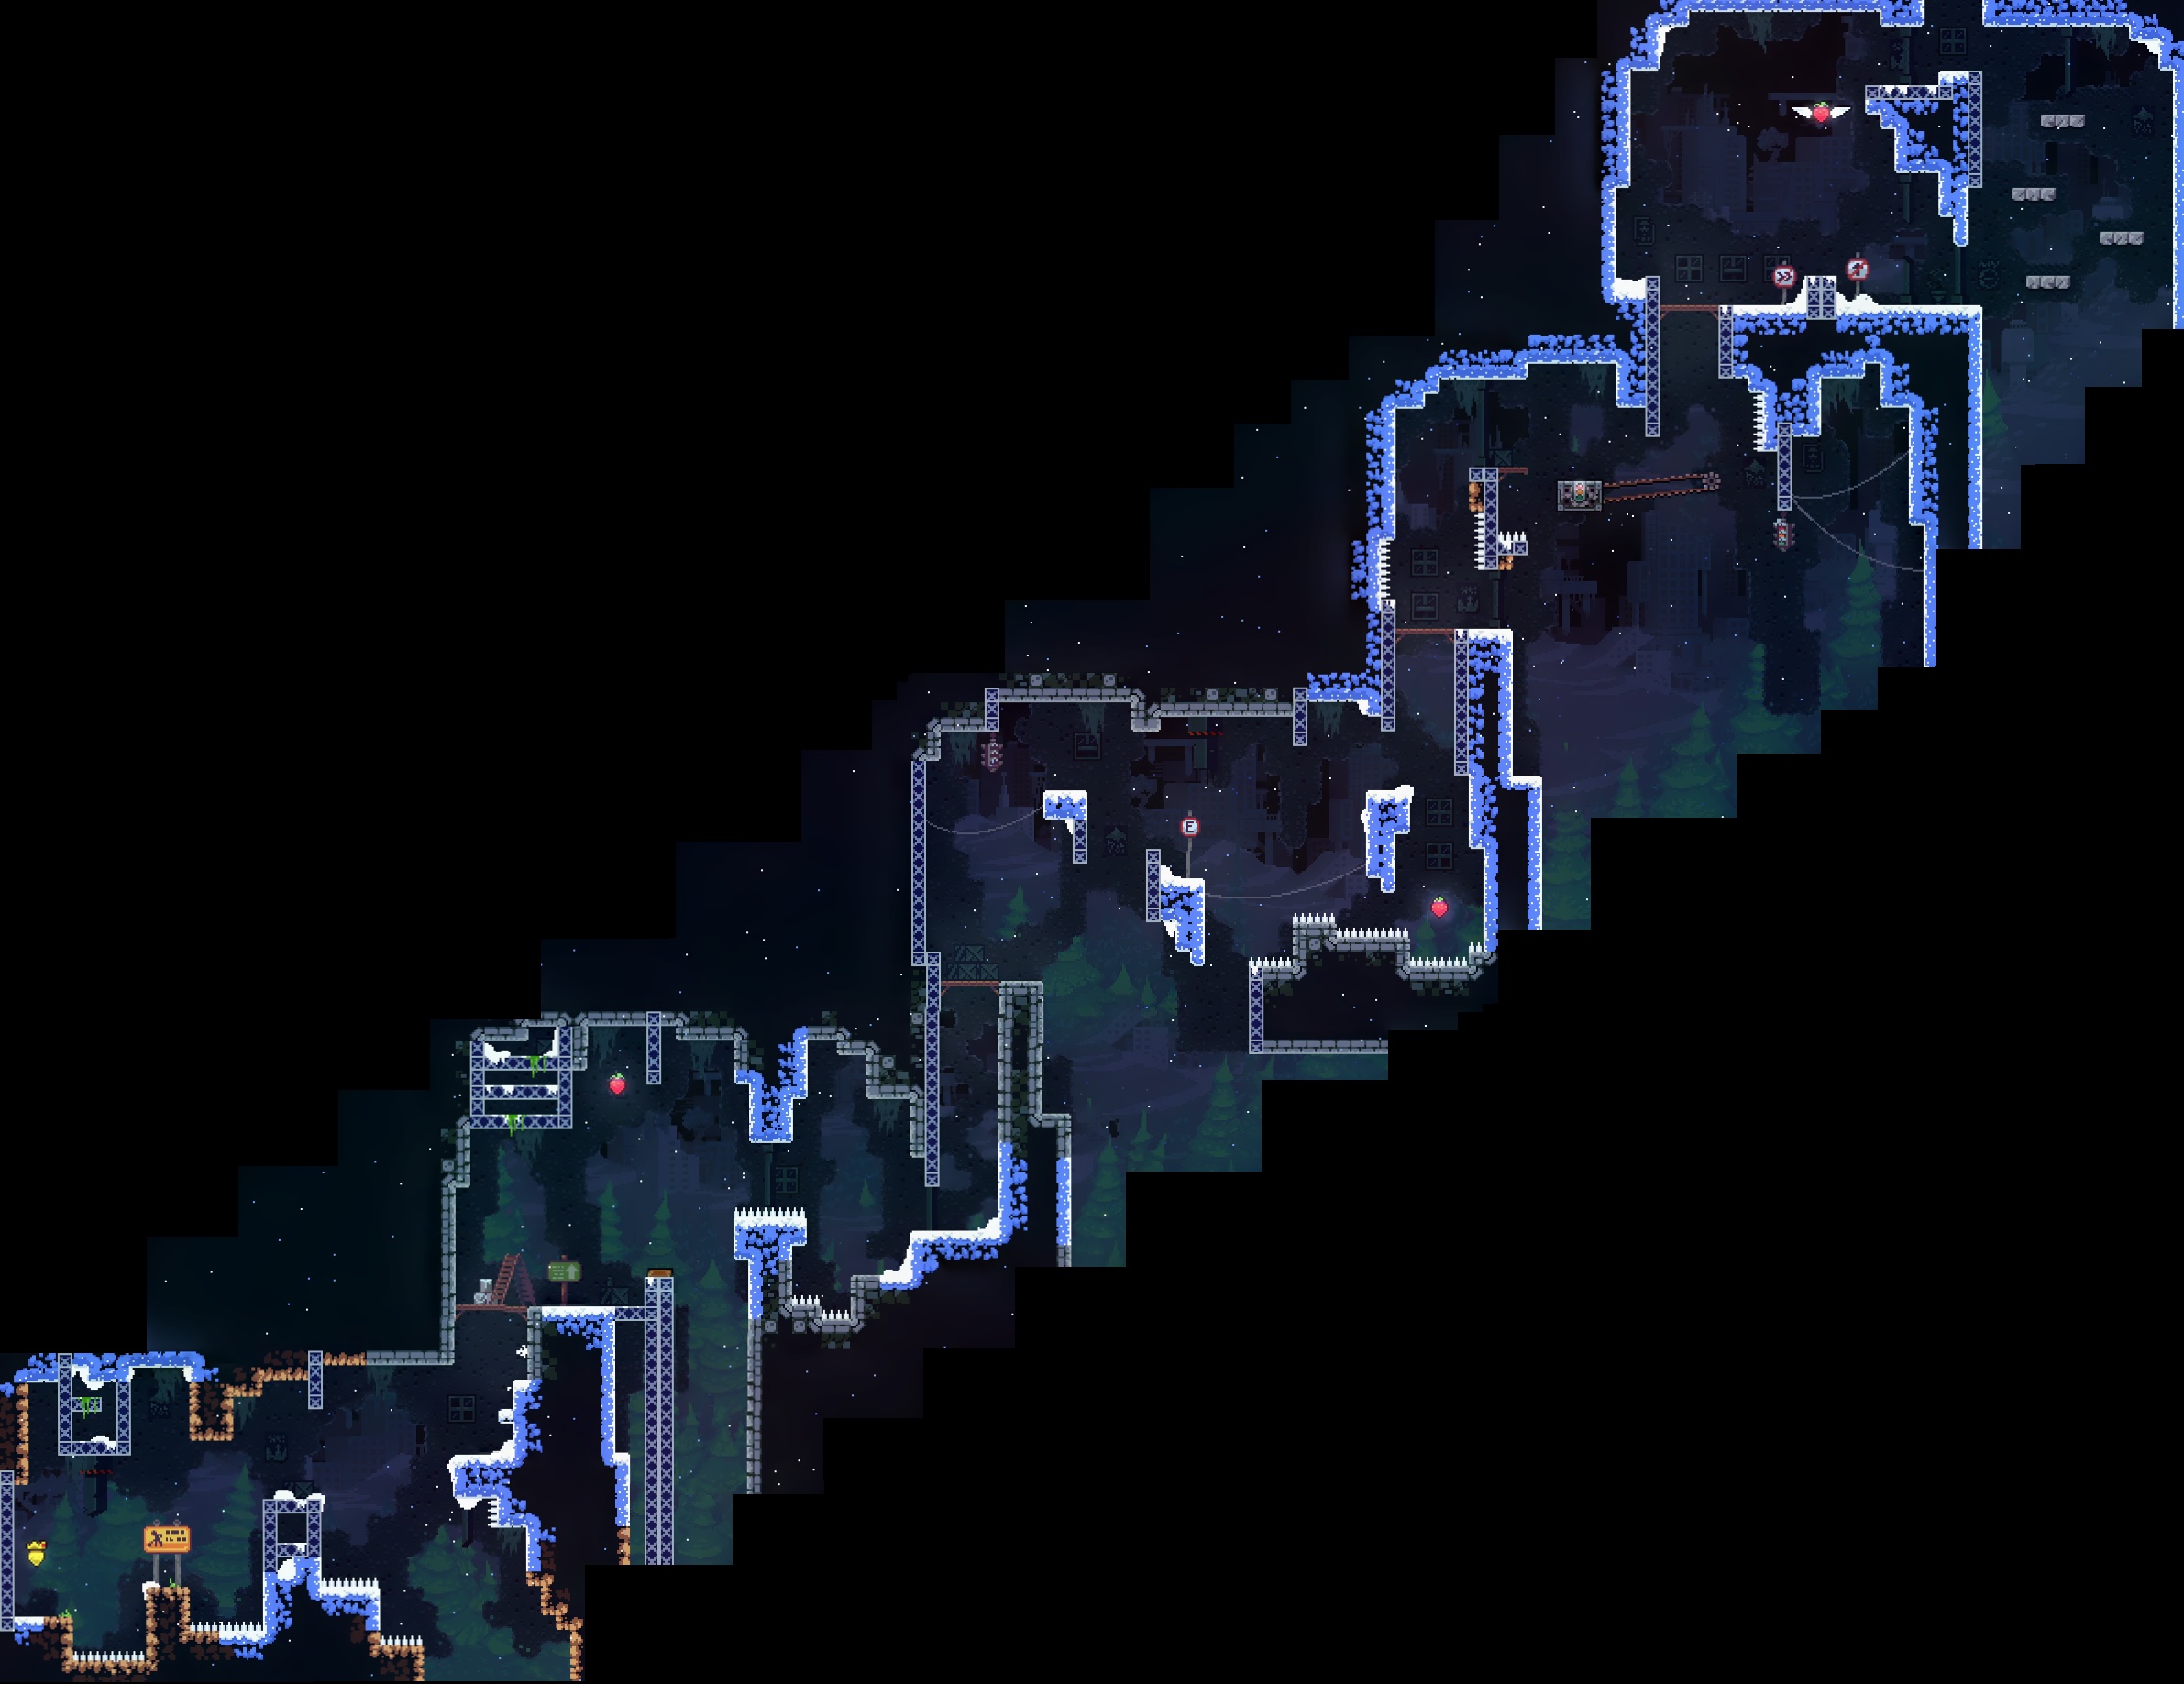
After writing some boilerplate code that calls the two functions above, I was able to generate a proof-of-concept image that successfully stitched my 22 screenshots into a cohesive whole:
Scaling Up
Now that I had a proof-of-concept working, it was time to take my approach a step further. I took a total of 234 screenshots and captured every level and camera transition on the Forsaken City.
Unfortunately, I wasn’t able to simply plug these 234 screenshots into my existing script. I found that the time it takes to stitch screenshots together increases exponentially compared to the number of screenshots being stitched. While I was able to stitch 22 screenshots together with my proof-of-concept code, trying to use all 234 screenshots made the code prohibitively slow.
Here is an intuitive explanation of why this slowdown occurred: OpenCV procedurally assembles each screenshot into a stitched image. Every new screenshot added to the final image is another group of features that needs to be checked when it’s time to add the next screenshots, leading to an exponential increase in the amount of computation performed.
One potential avenue for improvement was the fact that I did know roughly where each screenshot should be positioned relative to the previous screenshot (albeit not at a pixel-perfect level of precision). OpenCV did not have this positional context; the algorithm was relying entirely on identifying features within each image and then comparing those features against the features of every other image. If I could provide OpenCV with the general location of each screenshot, perhaps OpenCV would only have to compare the features in each screenshot with the features of that screenshot’s immediate neighbours, reducing the complexity of the algorithm from exponential time to linear time. Unfortunately, I wasn’t able to find a way to feed this rough positional data into OpenCV.
Eventually, I settled on a batching approach. I divided my library of screenshots into groups of roughly 20 images. Each group of images represented a contiguous area of the Forsaken City. I was left with 13 of these groups, each of which would assemble to form a large “chunk” of the completed map. The idea was to have OpenCV stitch together each chunk individually, after which I would align the chunks manually.
I created empty folders named chunks and inputs, then I put each batch of screenshots into its own subfolder of the inputs folder. For instance, the first batch of screenshots was in the inputs/01 directory, the second batch was in inputs/02, and so on. Finally, I wrote code to iterate through these subfolders and generate the appropriate chunks:
INPUT_DIR_PATH = os.path.join(os.getcwd(), 'inputs')
CHUNK_DIR_PATH = os.path.join(os.getcwd(), 'chunks')


def main():
    for input_dir_name in os.listdir(INPUT_DIR_PATH):
        sub_dir_path = os.path.join(INPUT_DIR_PATH, input_dir_name)
        images = load_images(sub_dir_path)

        print(f'Stitching {len(images)} images in {input_dir_name}...')
        chunk = stitch_images(images)
        chunk_file_path = os.path.join(CHUNK_DIR_PATH, f'{input_dir_name}.jpg')
        cv.imwrite(chunk_file_path, chunk)
After running this code, I found that some screenshots were omitted or could not be placed on the stitched image. In these instances, I added one or two more screenshots leading to the omitted screenshot to give it more space to “attach” to the stitched image.
Before long, I had a complete collection of 13 chunks:
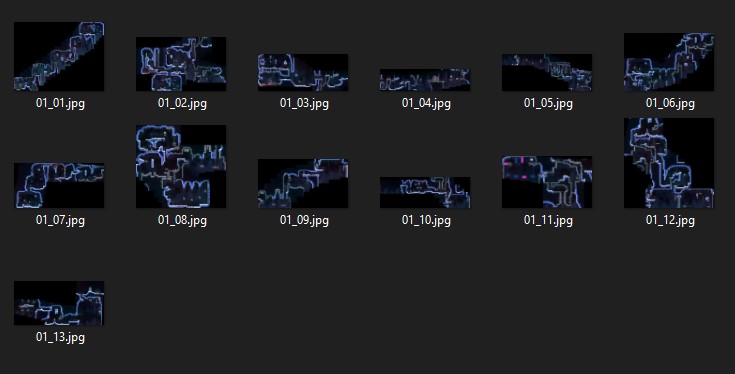
I considered trying to assemble these 13 chunks with OpenCV, but OpenCV would have considered the black, empty spaces on the edges of these chunks to be “features”. These margins would often prevent adjacent chunks from being matched and stitched together, so OpenCV would not be able to assemble these chunks. I wanted to tell OpenCV to interpret these black spaces as “wild cards” which could be matched against any feature, but this functionality does not seem to exist. Instead, I settled on assembling the chunks manually.
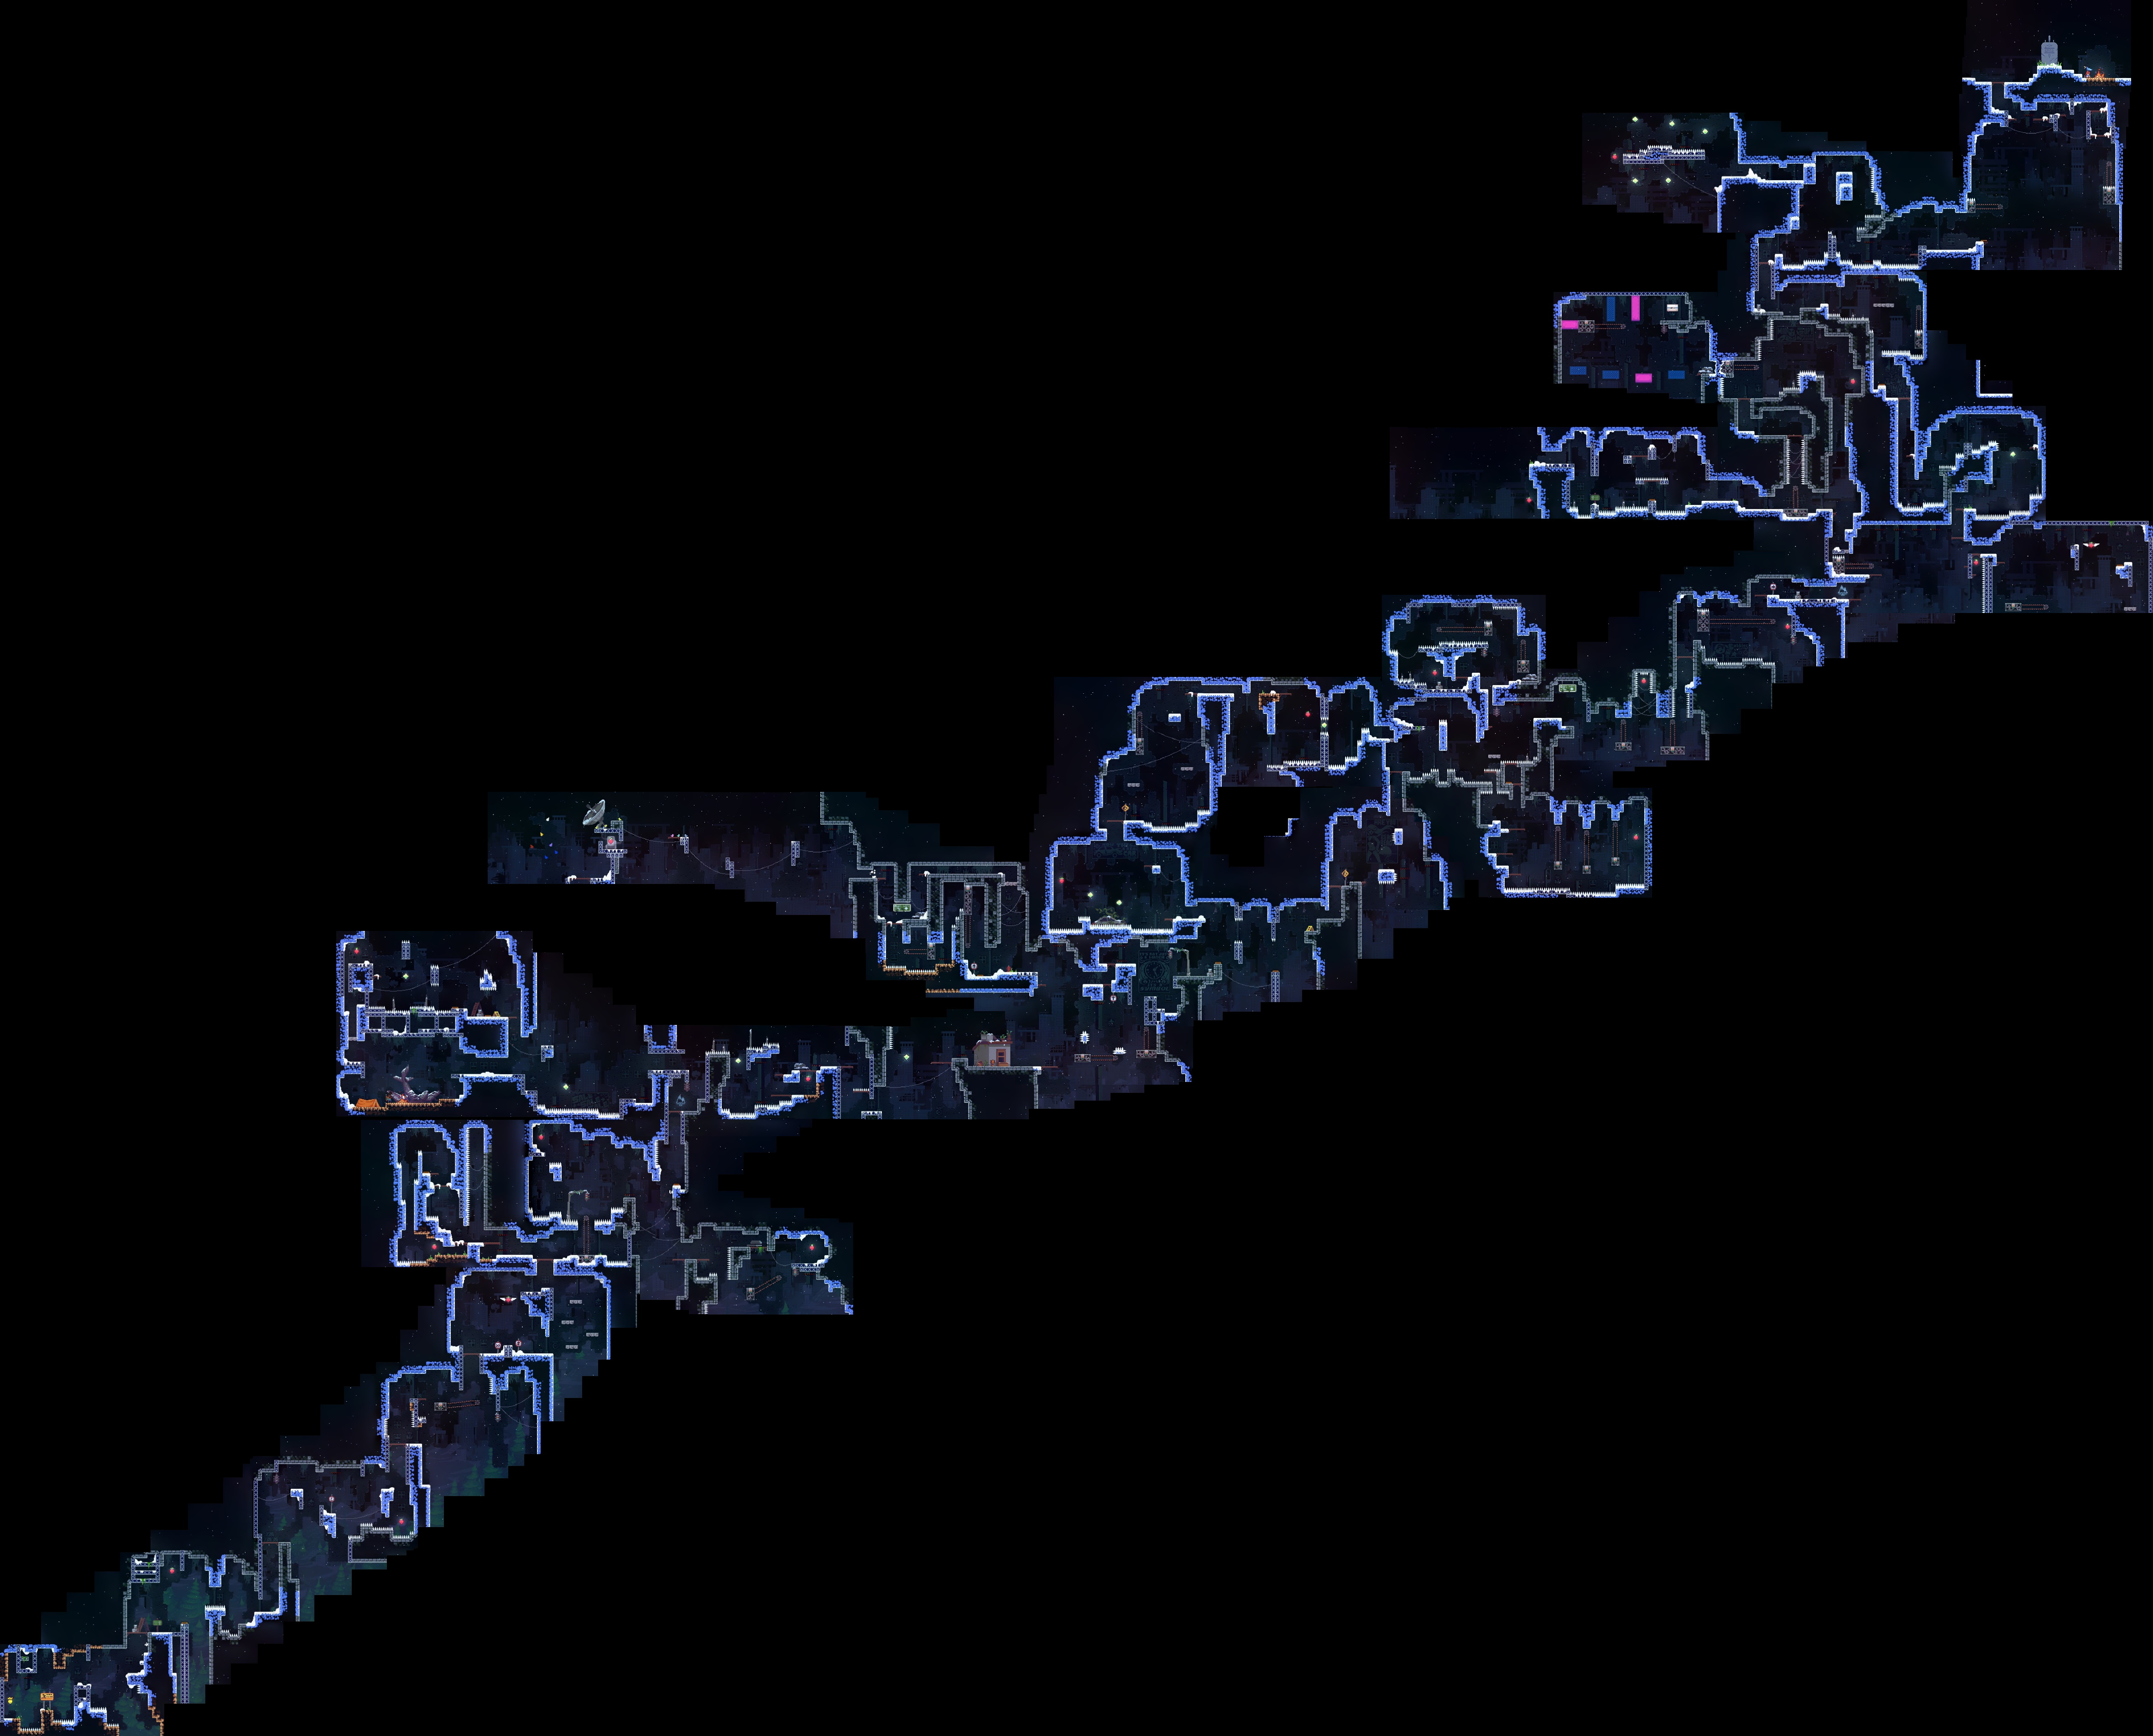
I opened up each of these chunk images in image editing software (specifically paint.net) and began the process of aligning the chunks. I only had 13 chunks to align, so this part of the process went by much more quickly than if I had tried to align all 234 screenshots by hand. Before too long, I had assembled the final image:
Final Thoughts
I had initially hoped that machine learning would be able to fully automate the process of stitching together an arbitrary number of screenshots. While undertaking this project, I discovered that OpenCV is not up to this task – at least not in its current state.
I identified a number of improvements that could be made to OpenCV that would facilitate this kind of image stitching. For instance, being able to provide the general location of each image would provide a helpful starting point for OpenCV, and would drastically reduce the computation required for stitching a large number of images. Another improvement would involve allowing OpenCV to treat pixels of a certain colour as “wild cards” that could match against any kind of feature. With this improvement, I would have been able to automate the process of assembling the chunks into the final image.
I encountered plenty of roadblocks during this project, and it’s likely that I actually spent more time trying to generate this image with machine learning than I would have spent just trying to piece all the screenshots together manually. Still, I was able to put together a general-purpose proof-of-concept that scales well, and I learned a great deal in the process.
Acknowledgements
- Laura McLean (for proofreading and editing)